Help
EasyVS allows users to perform Virtual Screening in four easy steps. In this section we describe each one of thiese steps in details.
Tutorial #1
Tutorial #2
Tutorial #3
Tutorial #4
Tutorial #5
Input Processing
Step 1 - Choose Protein Target

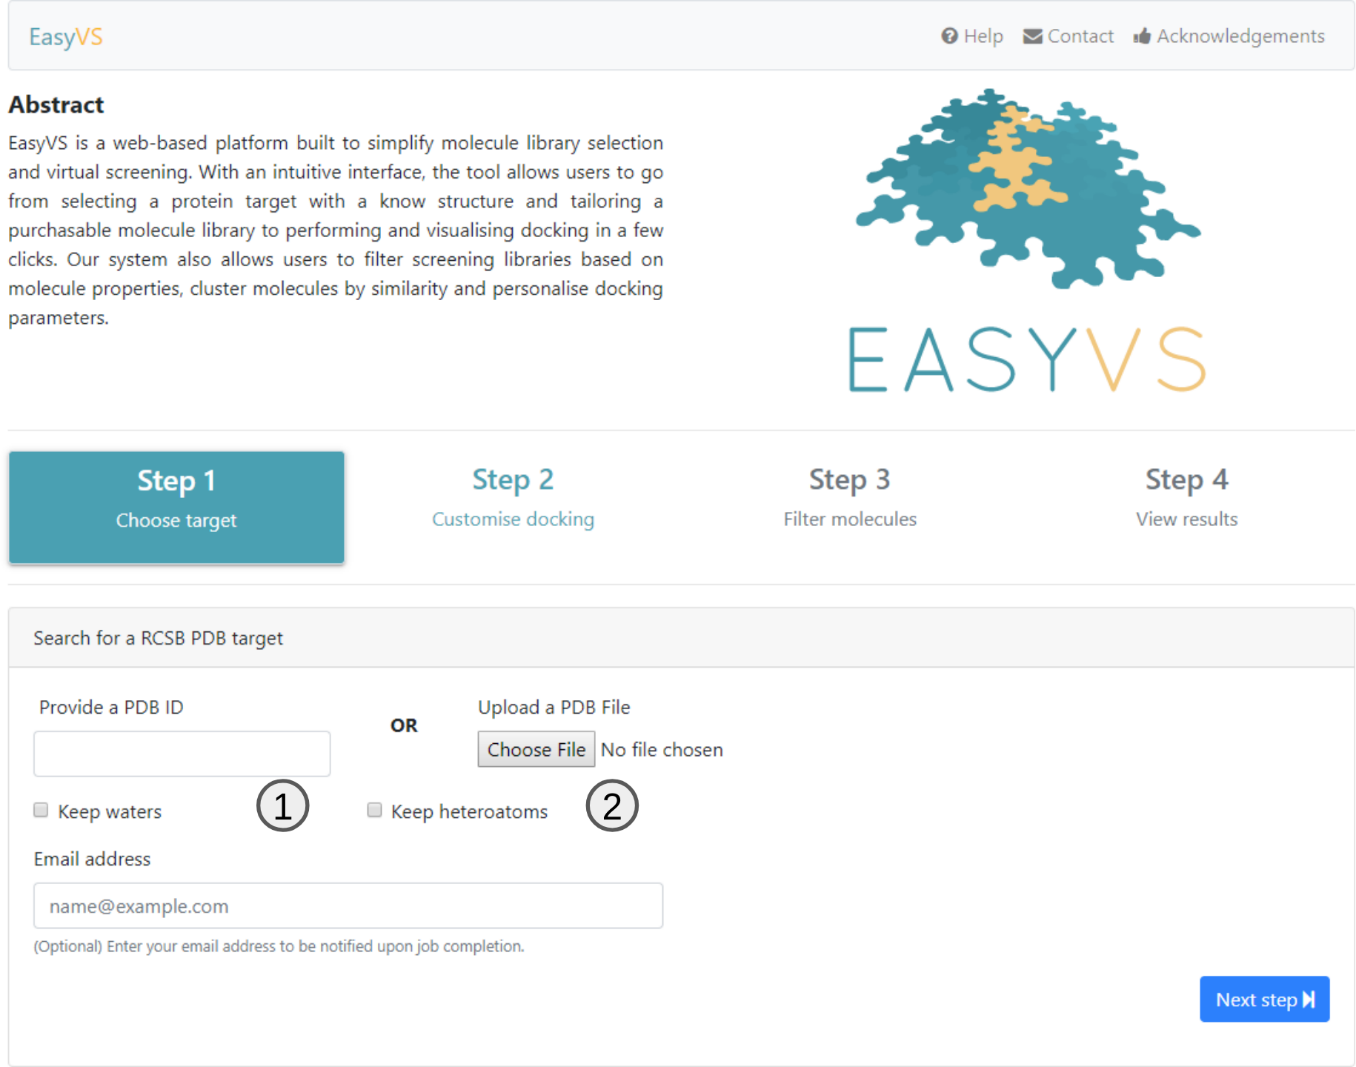
EasyVS, in its first step, allows the user to choose from structures deposited in the RCSB PDB (1) from the 4-character identifier code or even the user uploading a PDB file (2), containing the target to be studied .
By default, all structures are parsed and water molecules and Heteroatoms are removed. However, one can prevent this by marking the checkboxes available.
It should be noted that all files uploaded by the user will be kept for 15 days and after this period all the records of this file (including virtual screening results) will be deleted from the system.
If an email is provided, a link to the results page will be sent to the user as soon as the results are ready.
Click on Next step to proceed to step 2.
Step 2 - Customize the docking

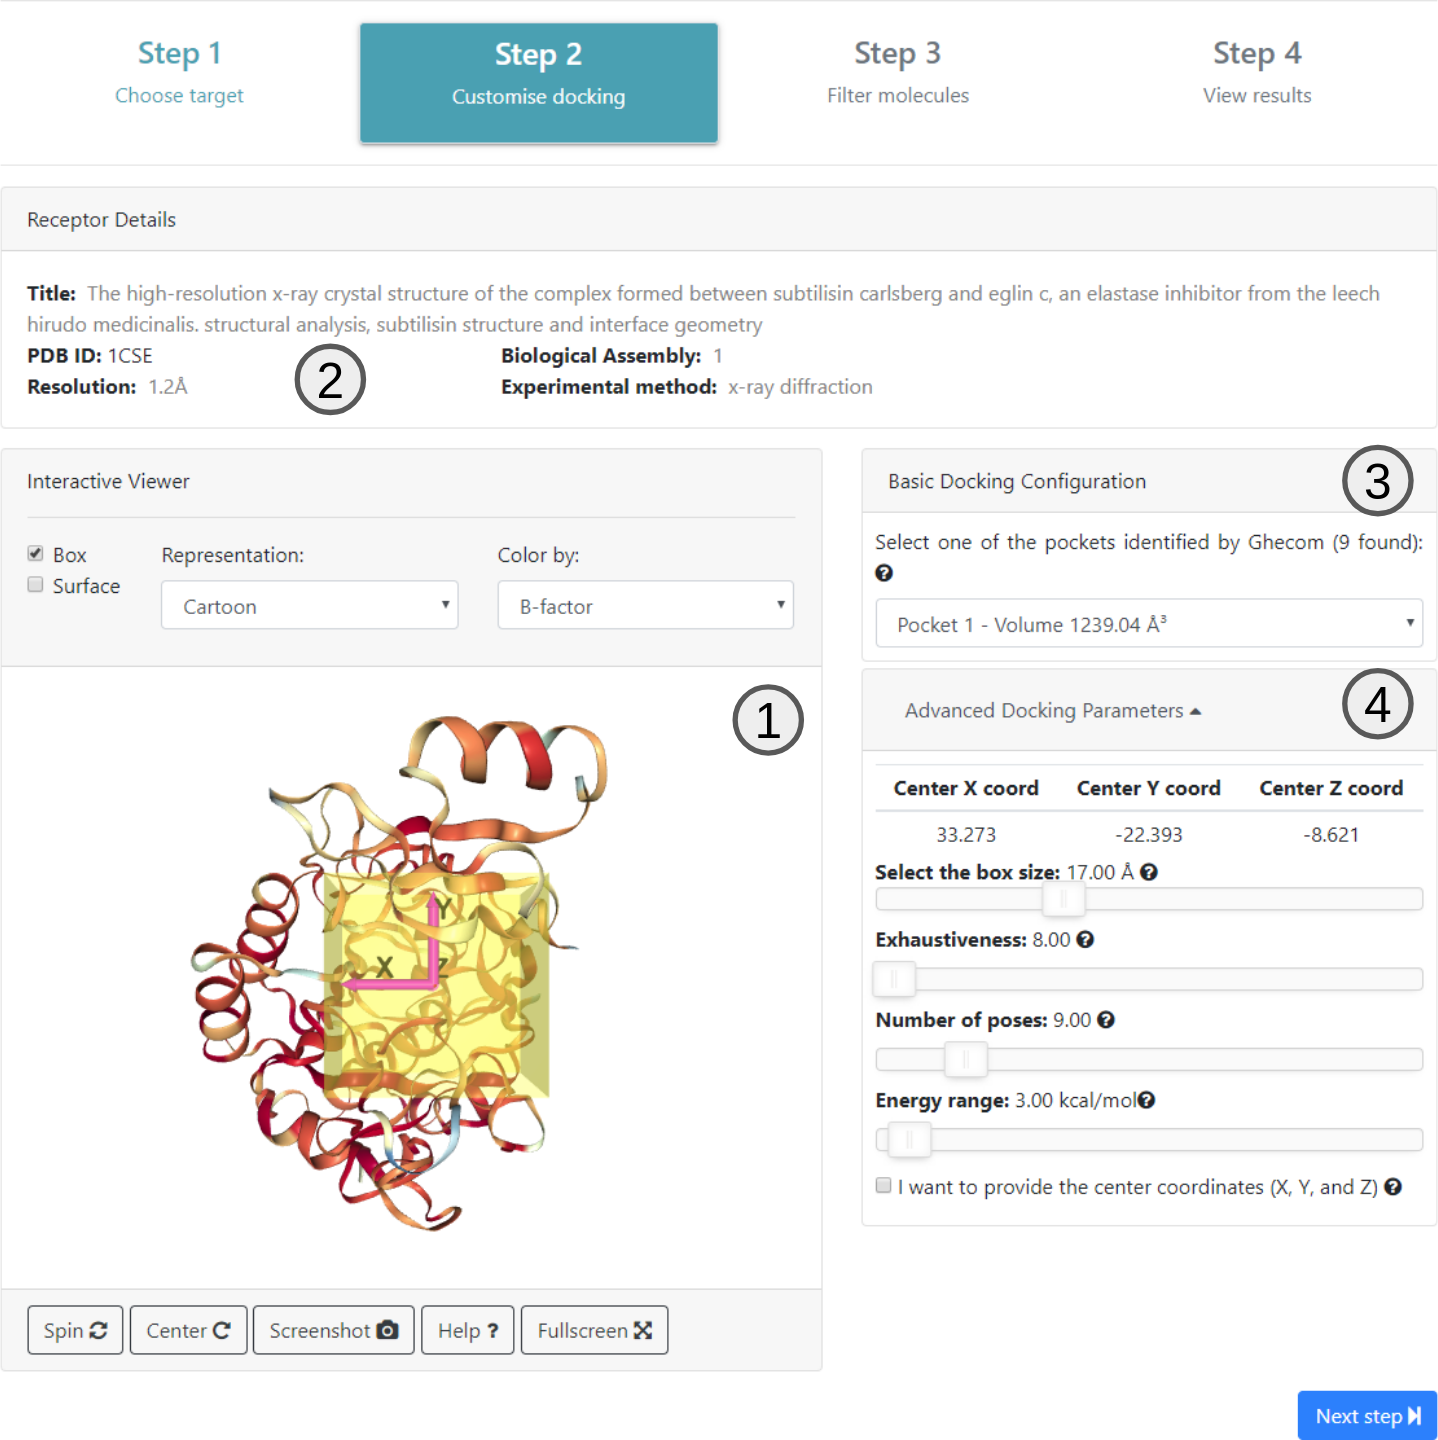
In step 2 the user is presented with the information about the submitted structure which is extracted from the header of the PDB file (2). An interactive 3D viewer is also available (1).
All pockets selected using Ghecom are available on 3 ordered by their volume and the spatial coordinates of the center of the selected pocket are shown. These are just suggestions for positioning the center of the box for the docking. The user can choose any value for these coordinates.
It is also possible on this screen to define the box size (measured in angstroms) and exhaustiveness (value that changes the amount of time the AutoDock Vina algorithm will use to find the lowest energy point) on Advanced Docking Parameters (4).
Click on Next step to proceed to step 3.
Step 3 - Build your own molecule library for screening

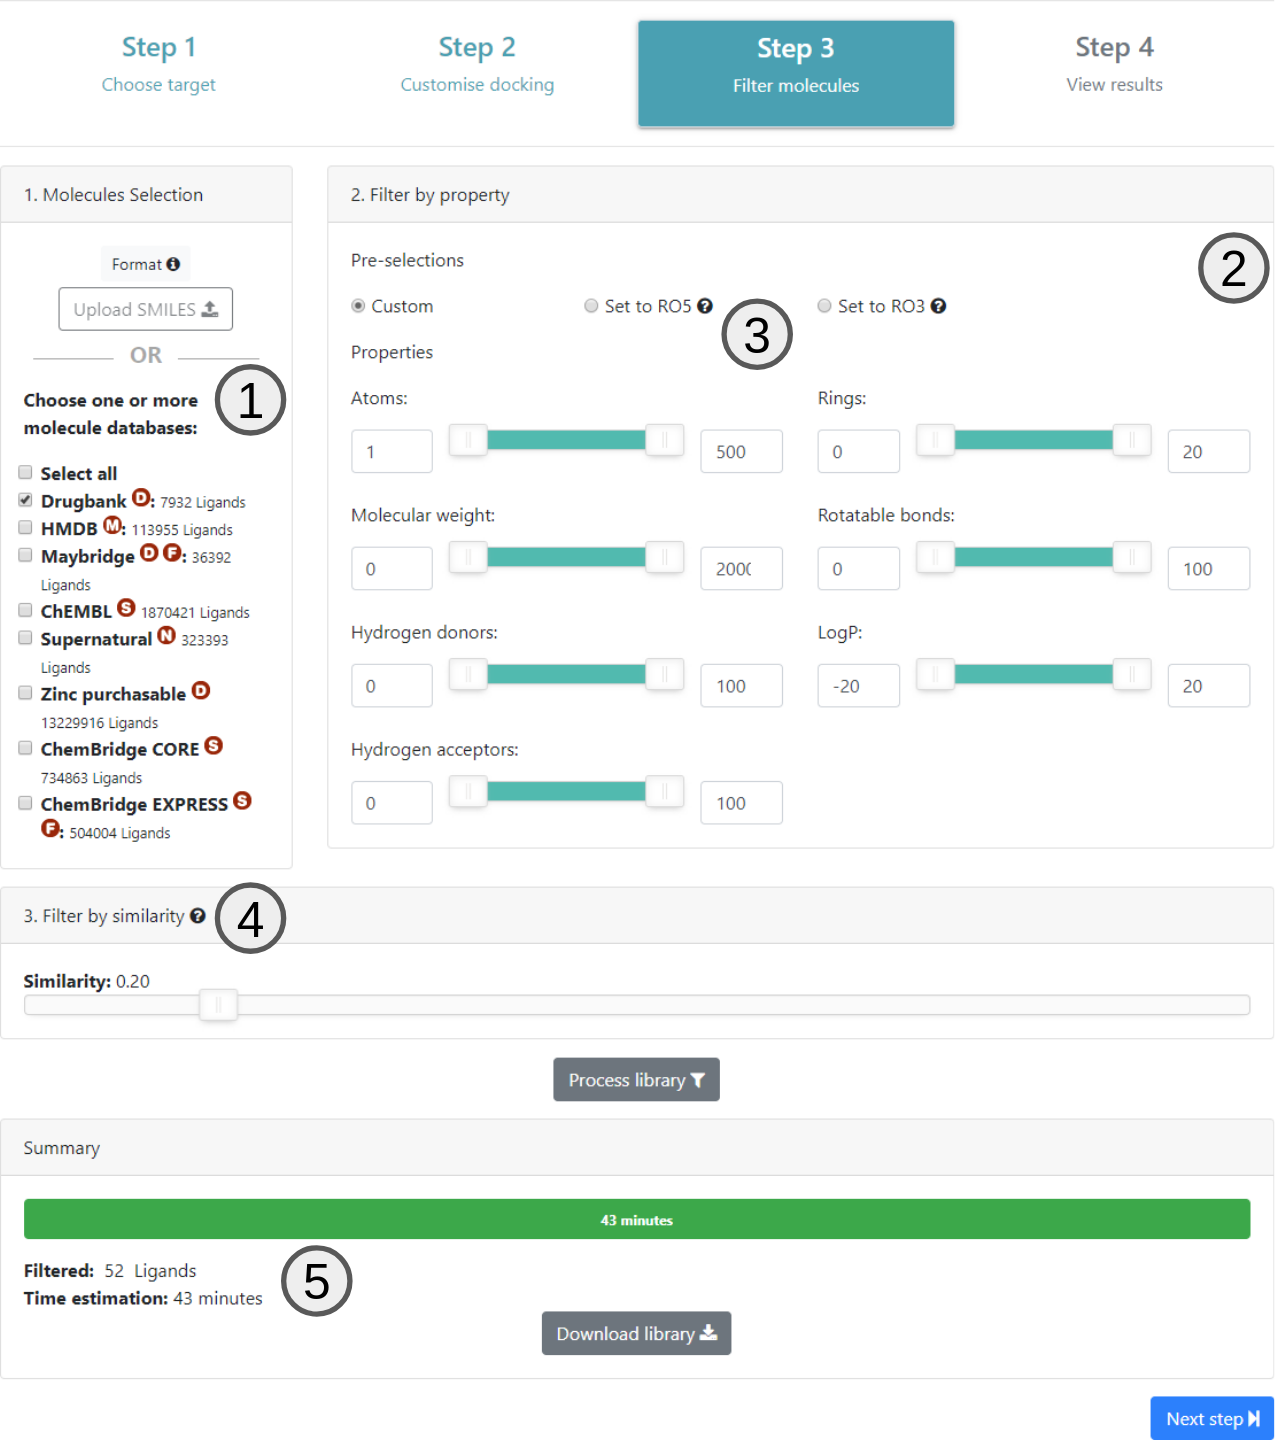
Once the docking parameters have been defined in step 2, the next page allows the user to choose the compound libraries available in EasyVS or by uploading its own library file (1).
Filters for several properties are available (2). All of these controls can be individually defined or even applied according to Lipinski Rule Of Five (no more than 5 hydrogen donors, up to 10 hydrogen acceptors, molar mass up to 500 Da and LogP less than or equal to to 5) or Rule Of Three (have up to 3 hydrogen donors, up to 3 hydrogen acceptors, have up to 3 rotatable bonds, molar mass up to 300 Da and LogP less than or equal to 3) (3).
Finally, users have to choose similarity level by which the molecules will be filtered (4). This will only be available if the user selects one of the databases available on 1. EasyVS uses the Butina algorithm for grouping, however, if the user chooses 1 for similarity value, all molecules are analyzed individually from the docking. If this similarity value is different, it indicates that the molecules of the same group must be, for example, 100% equal (according to fingerprint used), if the value is 1, or, 10% equal, with similarity selected as 0.1. It is known that the greater the value of similarity, the more groups will be generated.
Once all filtering properties are set, users should click on the Process library button to estimate how long the virtual screening will take to be processed (5).
After confirming the estimated time, clike on Next step to proceed.
Step 4 - View results

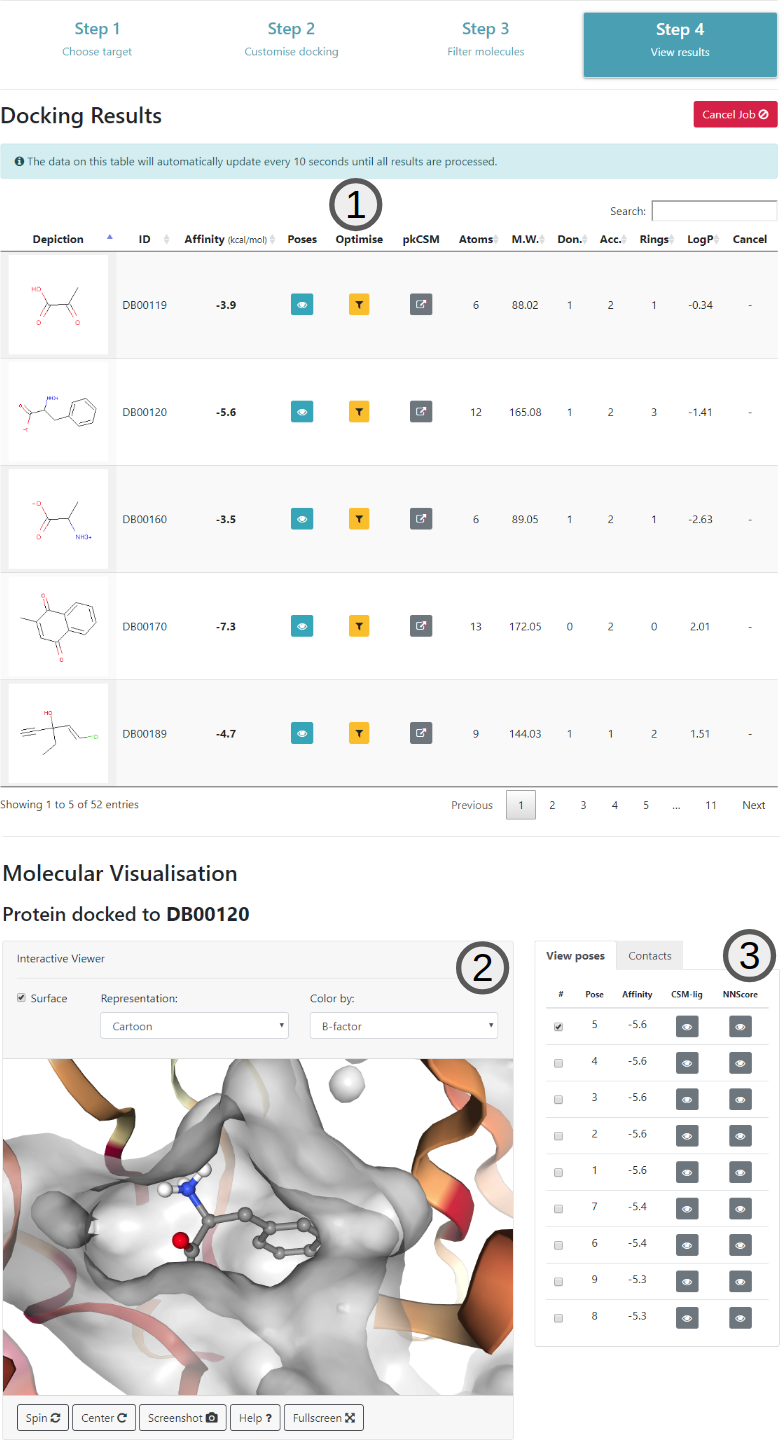
The last step of the virtual screening process consists in visualising the results of the docking according to the parameters of the previous steps. Here, all filtered molecules are shown in the main table (1). The table will be automatically populated as soon as the docking for each molecule is ready.
Once the docking for a molecule is ready and the affinity values are updated, users can click on the button on the table to load the poses (3) on the interactive viewer (2).
It should be noted that the parameters selected for docking are shown again at the bottom of this page.